LemonStand Version 1 Has Been Discontinued
This documentation is for LemonStand Version 1. LemonStand is now offered as a cloud-based eCommerce platform.
You can try the new LemonStand and learn about upgrading here.
Programming Module CMS Actions
Actions allow modules to add specific features to website pages. For example, the LemonStand Shop module has the following actions: shop:product, shop:category, shop:cart and many others. Actions allow you to prepare all data required for a specific page, effectively simplifying the page code. Also using actions you can handle POST and AJAX requests sent from website pages.
In this article we will continue extending the simple blog module, which we started in the Developing a simple module article. We will add actions for displaying a post list and a specific post on the front-end website.
Defining the module action class
Module actions are methods of a special class, which could be defined in any module. The class name should have the following structure: ModuleIdentifier_Actions. Our module identifier is AbcBlog, so the action class name for the blog module is AbcBlog_Actions. The class must be defined in the /modules/abcblog/classes/abcblog_actions.php file. Action classes should extend the Cms_ActionScope class. Here is a code of an empty action class of the AbcBlog module:
<?php
  class Abcblog_Actions extends Cms_ActionScope
  {
  }
?>
Creating the blog post list action
Now we can create an action for the blog posts page. This page will display all blog posts. A suitable action name is 'posts'. The action should be defined as a public method of the actions class:
<?php
class Abcblog_Actions extends Cms_ActionScope
{
public function posts()
{
}
}
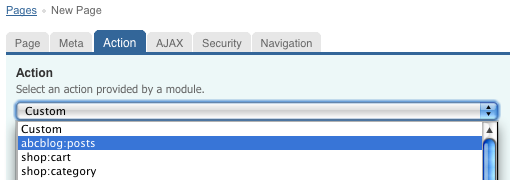
?>As soon as you define an action in the actions class, it becomes available on the CMS Create/Edit Page form. Let's create a new page (CMS/Pages/Add page) for testing your action. Do not forget to select the abcblog:posts action on the Action tab:
In the posts action we should prepare a list of all blog posts and generate a corresponding PHP variable. The Cms_ActionScope class, which we extend by the module action class, has the same fields and methods as the Cms_Controller class. It means that we can add page variables using the $this->data[] array. The code below creates the $posts variable and loads all blog posts into it:
public function posts()
{
  $obj = new AbcBlog_Post();
  $this->data['posts'] = $obj->order('created_at desc')->find_all();
}
The $posts variable is now available on all pages which use the abcblog:posts action and we can use it to display a list of posts on a page, for example using the following code:

This code outputs post titles. Each post title has a link to a corresponding post details page. In the example code we used the /abcblog_post URL for the post details page, but the actual URLs do not matter - URLs just should be consistent across the website.
If you have any blog posts created in your database, you can test the blog posts page:
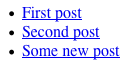
The links on the post titles has a suffix corresponding a specific blog post identifier, for example /abcblog_post/1, /abcblog_post/2, /abcblog_post/5. The last segment of the URL is needed for loading a specific post form the database on the blog post page, which we will create in the next section.
Creating the blog post details action
The blog post details action should prepare a PHP variable containing a requested blog post object. But we first should extract a post identifier from the last segment of a page URL. For this purpose we will use the request_param() method of the Cms_ActionScope class. Here is a code of the blog post action:
public function post()
{
  $this->data['post'] = null;

  $post_id = $this->request_param(0);
  if (!strlen($post_id))
    return;

  $obj = new AbcBlog_Post();
  $this->data['post'] = $obj->find($post_id);
}
The first line of the post action creates the $post variable and assigns the NULL value to it. We recommend to follow this pattern for all variables which could be supplied by an action, because it simplifies error handling in a front-end page implementation. If a requested post does not exist in the database, the $post variable is still presented.
The remaining part of the action code loads the first segment of the page URL and checks whether it is not empty. Then the code loads the blog post object from the database and updates the $post variable.
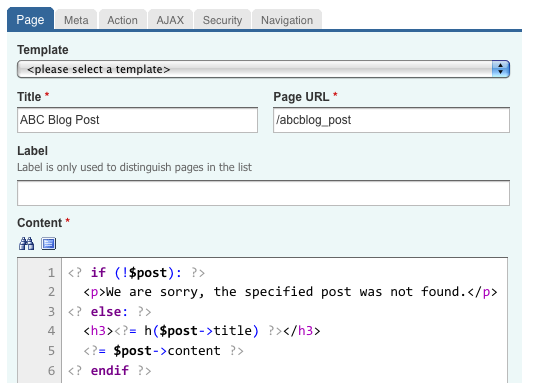
To test the new action, we need to create a page and assign the abcblog:post action to it. According the blog post list page example above, the blog post page should have the "abcblog_post" url. Below is an example code of the blog post page:
Developing form handlers
We often need to process some events which could occur on a front-end website page. For example, a blog post page can have a comment form. We should be able to process the form submission in the blog action class. LemonStand API allows you to implement both AJAX and regular POST form processing methods.
The post commenting feature is not implemented in our simple blog post module and we will not implement it now, because we already described all necessary techniques in the previous articles and you can do it by yourself. However we will demonstrate how you can handle the comment form submission in the blog action class.
Implementing the AJAX comment submission handler
We will start with developing the AJAX request handler. You may need to read the LemonStand front-end JavaScript Framework article to refresh your knowledge about implementing the AJAX requests on the front-end.
Let's add a comment form to the blog post page, which we created in the previous section. Below is a example of a simplest comment form, which contains a text area and a button.
<?= open_form() ?>
  <textarea name="comment"></textarea>
  <input
    type="button"
    value="Submit"
    onclick="$(this).getForm().sendRequest('abcblog:on_addComment')"/>
</form>
The important part of the example is the AJAX request initiation code, which refers the abcblog:on_addComment event handler. We need to add this handler to the blog action class. AJAX event handlers should be implemented as public class methods. There is a simple naming convention for AJAX event handlers - the function names should start with the on_ prefix. Public methods of the action class which have this prefix are considered as AJAX event handlers. All other public methods are considered as actions. Below is an example of the action handler implementation:
public function on_addComment()
{
/*
* Some code for adding a comment
*/
/*
* Trigger some error
*/
throw new Phpr_ApplicationException('Error adding the comment to the database!');
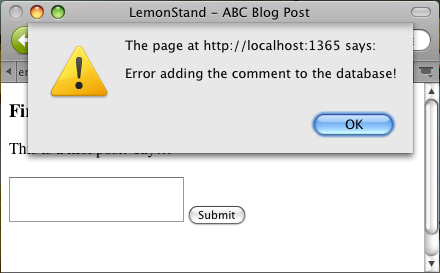
}This implementation example does not contain any real code for adding a comment to the database. But it demonstrates the error handling approach. If your code throws an exception inside an event handler, the AJAX front-end framework will display a standard alert window, containing the error message:
Implementing the POST handler
Now we will demonstrate how you can process a regular POST request for adding a blog comment. We will use the event handler which we developed for the AJAX processing, but this time we will call it manually from the blog post action. Here is a code of the update blog post action:
public function post()
{
$this->data['post'] = null;
$post_id = $this->request_param(0);
if (!strlen($post_id))
return;
$obj = new AbcBlog_Post();
$this->data['post'] = $obj->find($post_id);
if (post('add_comment'))
$this->on_addComment();
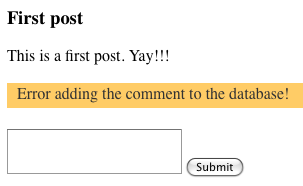
}The two lines in the end of the method check whether the 'add_comment' field exists in the $_POST array. If so, the code calls the event handler which we created before. We need to update our front-end form in order to add the 'add_comment' variable to the POST array and to display error messages correctly:
<?= open_form() ?>
  <?= flash_message() ?>

  <textarea name="comment"></textarea>
  <input type="submit" value="Submit" name="add_comment"/>
</form>
Please note that we used the flash_message() function for displaying error messages. Also the SUBMIT element has the add_comment name, which allows our action to detect the comment form submission. Here is a screenshot of the blog post page displaying an error message
Conclusion
In this article we demonstrated how your modules can add new features to the front-end website and how you can process forms in AJAX and POST modes. The important thing about event handlers that it is possible to use a single function for processing AJAX and POST requests.
You can download the updated blog module here.
Next: Using Module Access Points
Previous: Guide to Build a Simple LemonStand Module
Return to Understanding LemonStand Modules