LemonStand Version 1 Has Been Discontinued
This documentation is for LemonStand Version 1. LemonStand is now offered as a cloud-based eCommerce platform.
You can try the new LemonStand and learn about upgrading here.
Adding a Layout
This page continues the Creating pages with LemonStand article.
The "Template" term has been replaced with "Layout" in the newer LemonStand versions.
When you create multiple pages with LemonStand you will soon find that you repeat the same HTML code in all pages – the HEAD and BODY tags declarations, page headers and footers. Layouts allow you to reuse the common code. Layouts act as wrappers for your pages. They usually contain the required HTML tags like HEAD, TITLE and BODY, as well as common blocks of your pages – website navigation, footer, header, sidebar etc. You can have as many layouts as you need. For simple websites two layouts usually are enough – for the Home page and for inner pages. The following image illustrates the idea behind layouts.
Let's create a simple layout for our Hello World example. Go to the CMS/Layouts page and click the Add layout button. Specify any name in the Name field. The layout we are creating will contain all required HTML tags, and the simple header and footer elements. The page itself will be rendered between the header and footer.
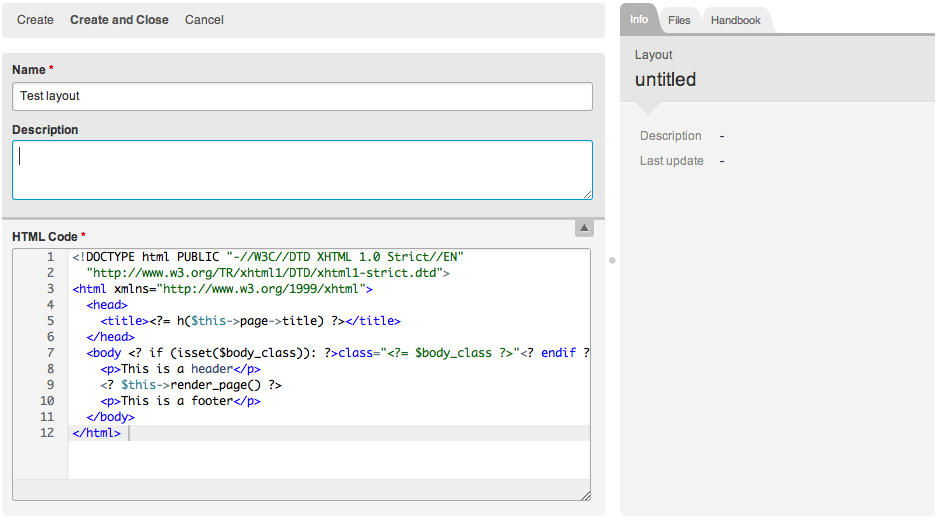
Paste the following code to the HTML Code field.
<!DOCTYPE html PUBLIC "-//W3C//DTD XHTML 1.0 Strict//EN"
	"http://www.w3.org/TR/xhtml1/DTD/xhtml1-strict.dtd">
<html xmlns="http://www.w3.org/1999/xhtml">
	<head>
		<title><?= h($this->page->title) ?></title>
	</head>
	<body <? if (isset($body_class)): ?>class="<?= $body_class ?>"<? endif ?>>
		<p>This is a header</p>
		<? $this->render_page() ?>
		<p>This is a footer</p>
	</body>
</html>
<!DOCTYPE html PUBLIC "-//W3C//DTD XHTML 1.0 Strict//EN"
	"http://www.w3.org/TR/xhtml1/DTD/xhtml1-strict.dtd">
<html xmlns="http://www.w3.org/1999/xhtml">
	<head>
		<title>{{ this.page.title }}</title>
	</head>
	<body class="{{ body_class }}">
		<p>This is a header</p>
		{{ render_page() }}
		<p>This is a footer</p>
	</body>
</html>
The key element in the page layout code is the $this->render_page() function call. It outputs the current page content. You can use a single layout with multiple pages, and this function call will always output the content of a specific page which your visitor views at the moment. The $this variable refers the Cms_Controller class object, which you can use for obtaining important information about the current page and the page execution environment.
Also, please note how the page title in the TITLE tag is displayed. It uses a piece of PHP code which refers to the $title field of the current page object. The current page object is always assigned to the $this->page field. This field contains a reference to the current Page object (an object of Cms_Page class). The h function which wraps the page title converts HTML entities to a safe representation (< becomes < and so on). You can find information about the most useful functions and classes in the Handbook block which is available in the Page, Layout and Partial editors.
Click the Create button and then the Close button. Now it is time to assign the just create layout for the Hello World page. Return to the CMS/Pages page and click the Hello World page. Select the layout you just created in the Layout drop-down list and click the Save button.

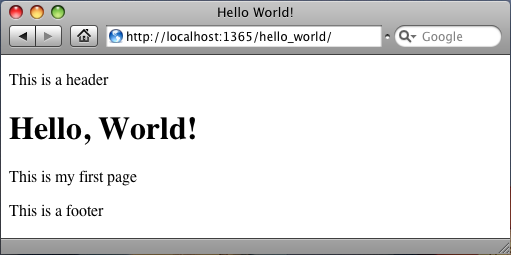
Now you can click the page link above the form and check how the page looks now. As you can see the header and footer declared in the layout are displayed around the page content.
Next: Creating a Partial
Previous: How to Create a LemonStand Page
Return to The Page Basics