LemonStand Version 1 Has Been Discontinued
This documentation is for LemonStand Version 1. LemonStand is now offered as a cloud-based eCommerce platform.
You can try the new LemonStand and learn about upgrading here.
Enabling Customer Login and Logout
Customer login and logout pages enable existing customer to sign in and out of the system. Only registered customers can log into the store. The process of creating a registration page is described in the Customer registration page article.
During a customer session, the $this->customer variable (an object of class Shop_Customer) is available in the code of all LemonStand pages. You can use this variable to load customer's orders and other customer-related information.
Creating the customer login page
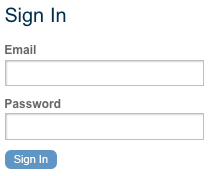
To create a customer login page, create a new page and assign it a name and URL. The login page name and url could be anything. Click the Action tab and select the shop:login action in the drop-down menu. The shop:login action processes the Login button click.
The following code demonstrates content of the login page.
<?= open_form() ?>
  <?= flash_message() ?>
  <label for="login_email">Email</label>
  <input id="login_email" type="text" name="email" value="<?= h(post('email')) ?>"/><br/>

  <label for="login_password">Password</label>
  <input id="login_password" type="password" name="password"/><br/>

  <p><input type="submit" name="login" value="Login"/></p>
  <input type="hidden" name="redirect" value="/"/>
</form>
{{ open_form() }}
{{ flash_message() }}
<label for="login_email">Email</label>
<input id="login_email" type="text" name="email" value="{{ post('email') }}"/><br/>
<label for="login_password">Password</label>
<input id="login_password" type="password" name="password"/><br/>
<p><input type="submit" name="login" value="Login"/></p>
<input type="hidden" name="redirect" value="/"/>
</form>The code outputs the HTML FORM element using the open_form function. The flash_message function used to output forms error messages. Then the code outputs a pair of input elements for entering a customers email and password. Please note the names of the input elements – they could not be changed. Also, please note the Login button name – login. You should not change it as well, otherwise LemonStand will not be able to process form data.In the hidden field with name the redirect you can specify a URL of a page you want the visitor to be redirected to after logging in.
Creating the customer logout page
The logout page closes a customer's session. You can display any information on this page, or redirect a visitor from the logout page to any other page.
To create the logout page, start with creating a new page and assign it a name and URL. As usual in LemonStand, the logout page can have any name and URL. Go to the Action tab. There is no special action for logging out a customer in LemonStand, so you need to enter a line of PHP code to the Action Code field:
customer_logout();
This code closes the customer session. Optionally you can specify a URL, the browser should be redirected after logging out. The following code closes a customer session and redirects a browser to the home page of your store.
customer_logout('/');If you are redirecting a browser after logging out, you can specify some content in the page Content field, for example:
<p>Logging out...</p>
Otherwise you should provide a logout page content as you do with any other page.
After creating the logout page you can create a logout link on the pages of your store.
See also:
Next: Creating a Customer Registration Page
Previous: Customer Accounts and Registration
Return to Customer Accounts and Registration