LemonStand Version 1 Has Been Discontinued
This documentation is for LemonStand Version 1. LemonStand is now offered as a cloud-based eCommerce platform.
You can try the new LemonStand and learn about upgrading here.
Settings
This section will take your through the settings page in the backend of your LemonStand store.
We will guide you through most of the important settings you will want to configure to get your LemonStand Store running.
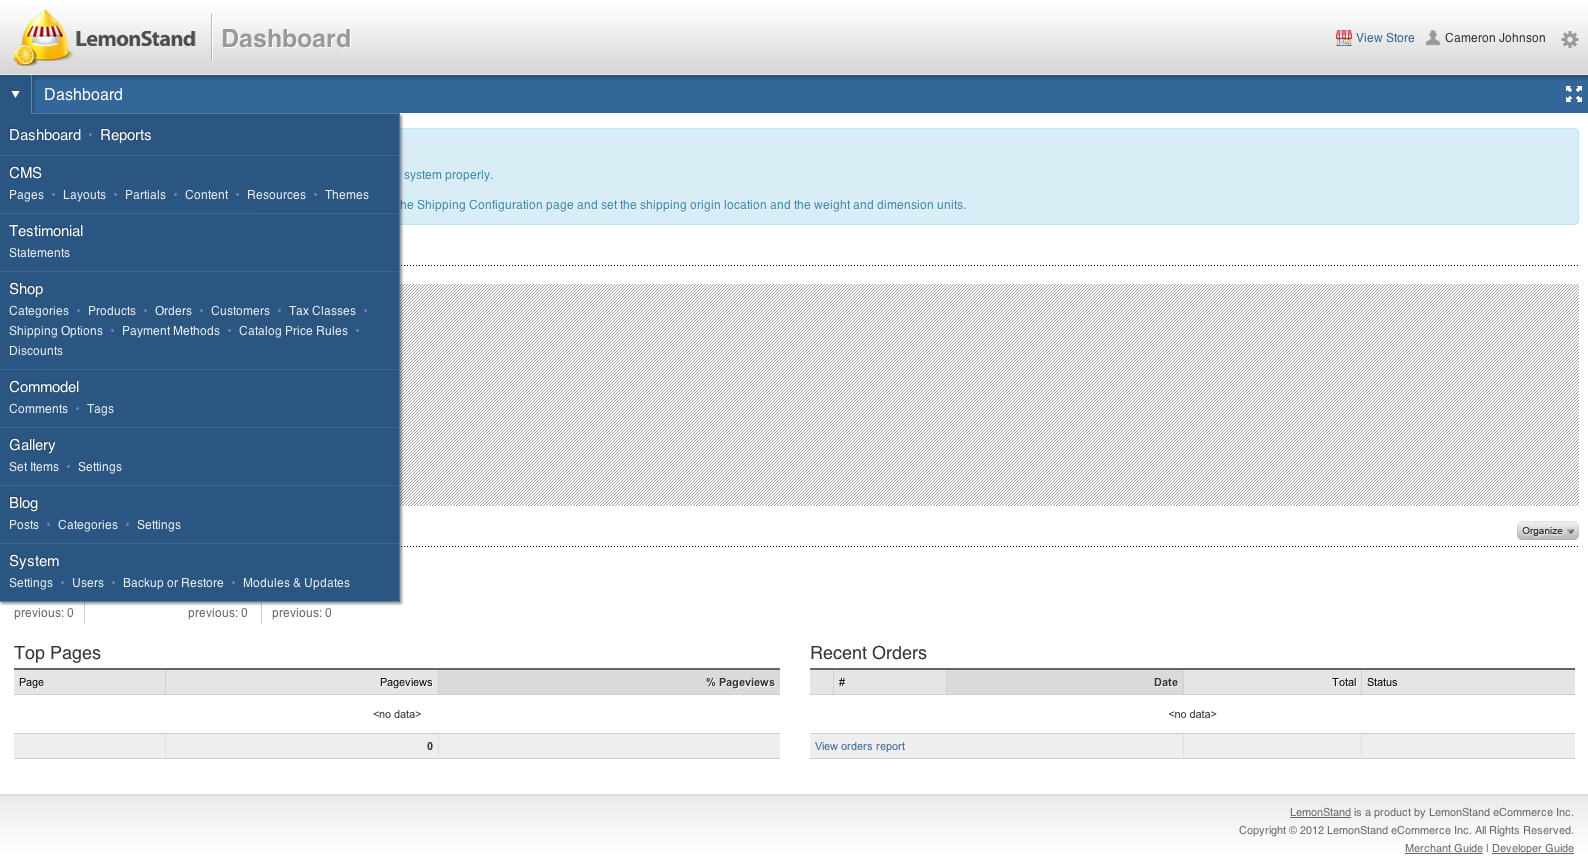
To get to the setting page, click on the down arrow to access the navigation menu. Next under System, click the settings link.

This is how the settings page is looks like. There may be more options available depending on what modules you have installed. Lets look at the first setting page, Statistics and Dashboard.
CMS
Statistics and Dashboard

The first tab is Google Analytics Integration. We recommend you setup a Google Analytics account for your Lemonstand store because it provides a more indepth reporting than Lemonstand's built in statistics.
To configure Google Analytics please follow this documentation: /docs/configuring_the_google_analytics_integration/
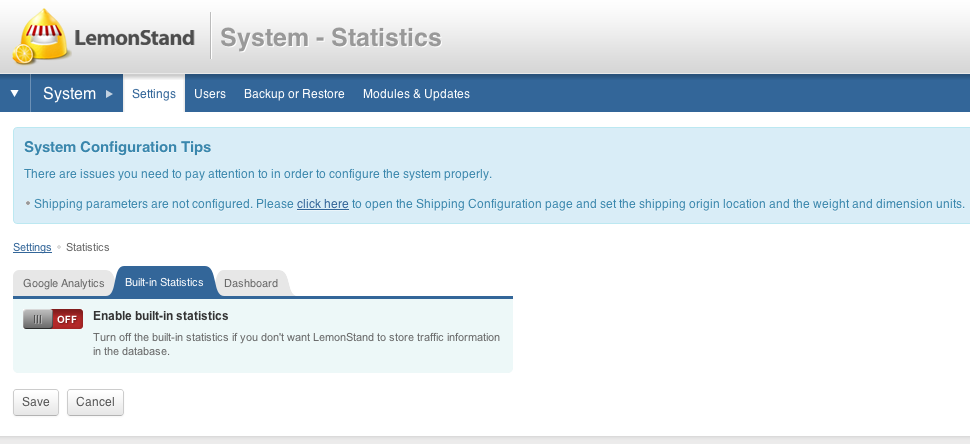
The built-in statistics will keep track of the traffic information and store the pageviews per ip address in the database. The IP filters allow you to filter out your own IP address so as to not skew the pageviews with your own while developing.
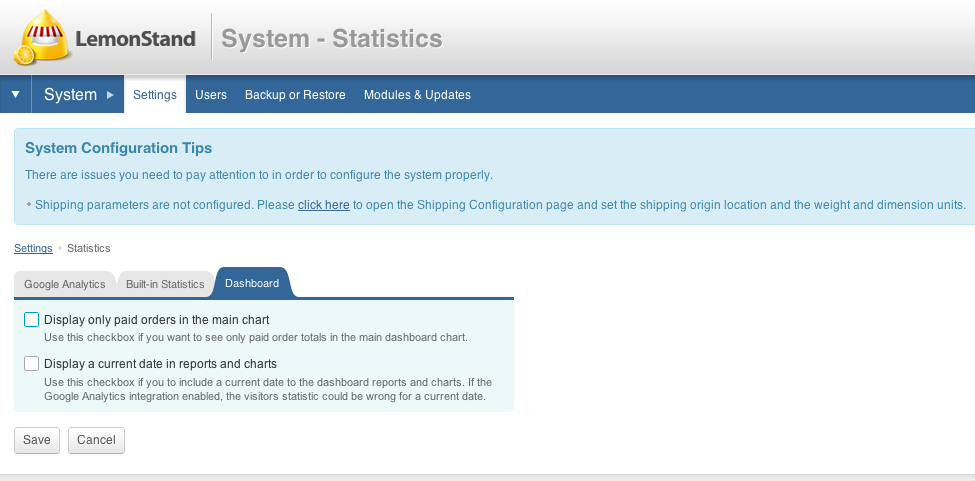
Under the dashboard tab you can specify if you want only paid orders to show up and whether you want the current date to be included in reports and charts.
Google Analytics only reports statistics after 24hrs so if you include the current date in reports it may be inaccurate.
CMS Settings
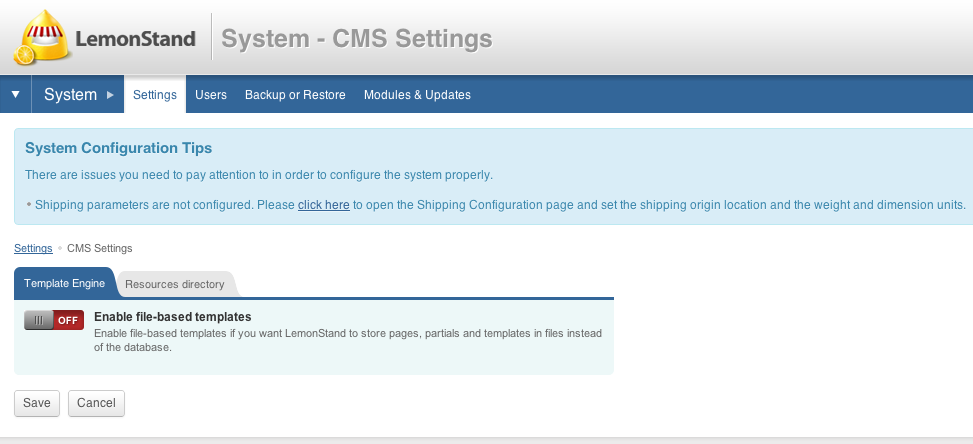
The template engine allows you to save the CMS pages as individual files instead of to the database. This is useful if you want to use an external file editor to manage and edit your CMS pages and partials.
For help setting up file-based templates refer to this documentation: /docs/using_file_based_templates/
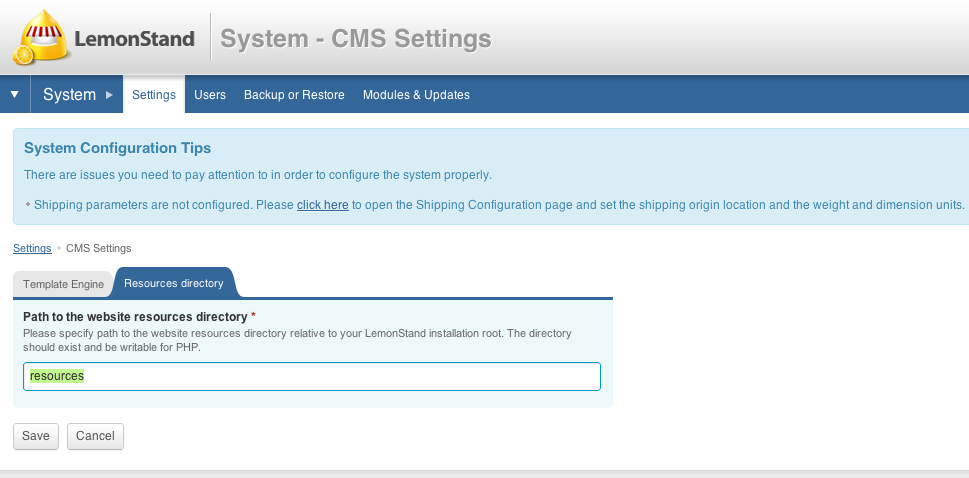
In the resource directory tab you can manage where you would like the external resources for your project like css, javascript and image files are stored.
Maintenance Configuration
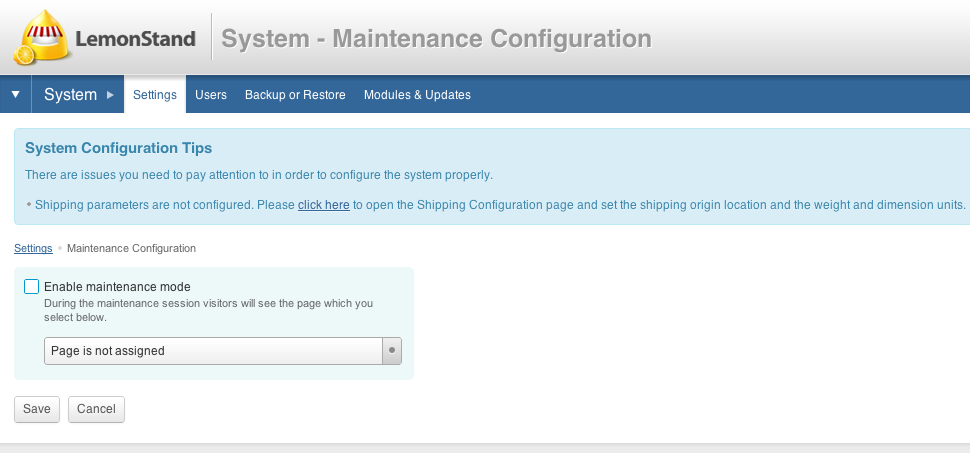
While you are working on your LemonStand store, you can enable maintenance mode. This allows people who visit your site to see a splash page, which you can create to let them know that the site is under construction or maintenance. You can create your own page under CMS->pages.
When you are logged into the backend of your LemonStand store, this will bypass the maintenance page allowing you to freely work on your site.
System
Email Settings
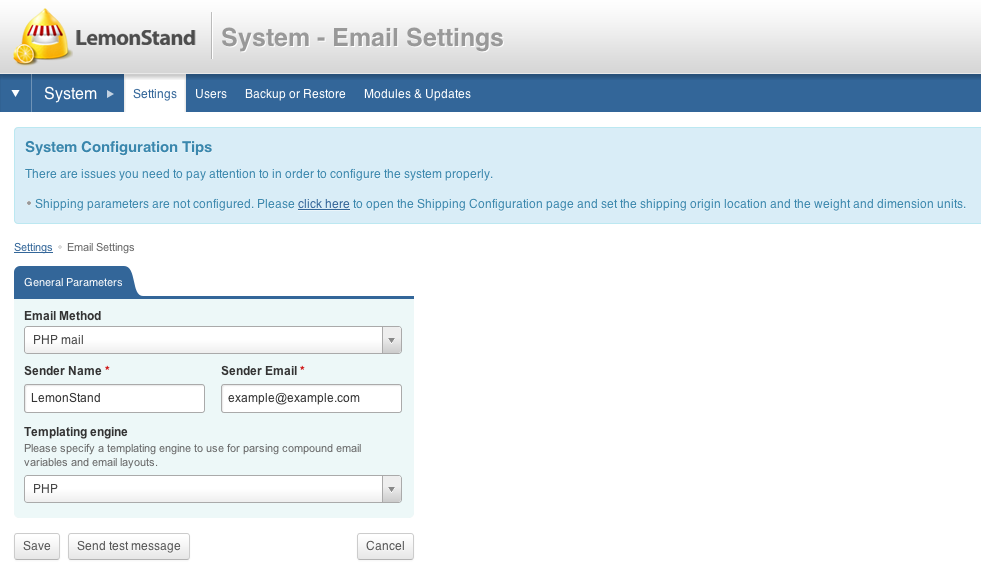
In the email settings you can specify the outgoing mail sender name and email. You can also choose which method you wish to use to send the mail, PHP mail, Sendmail, or SMTP.
You can also choose whether your email templates use PHP or Twig with the templating engine dropdown.
Email Templates
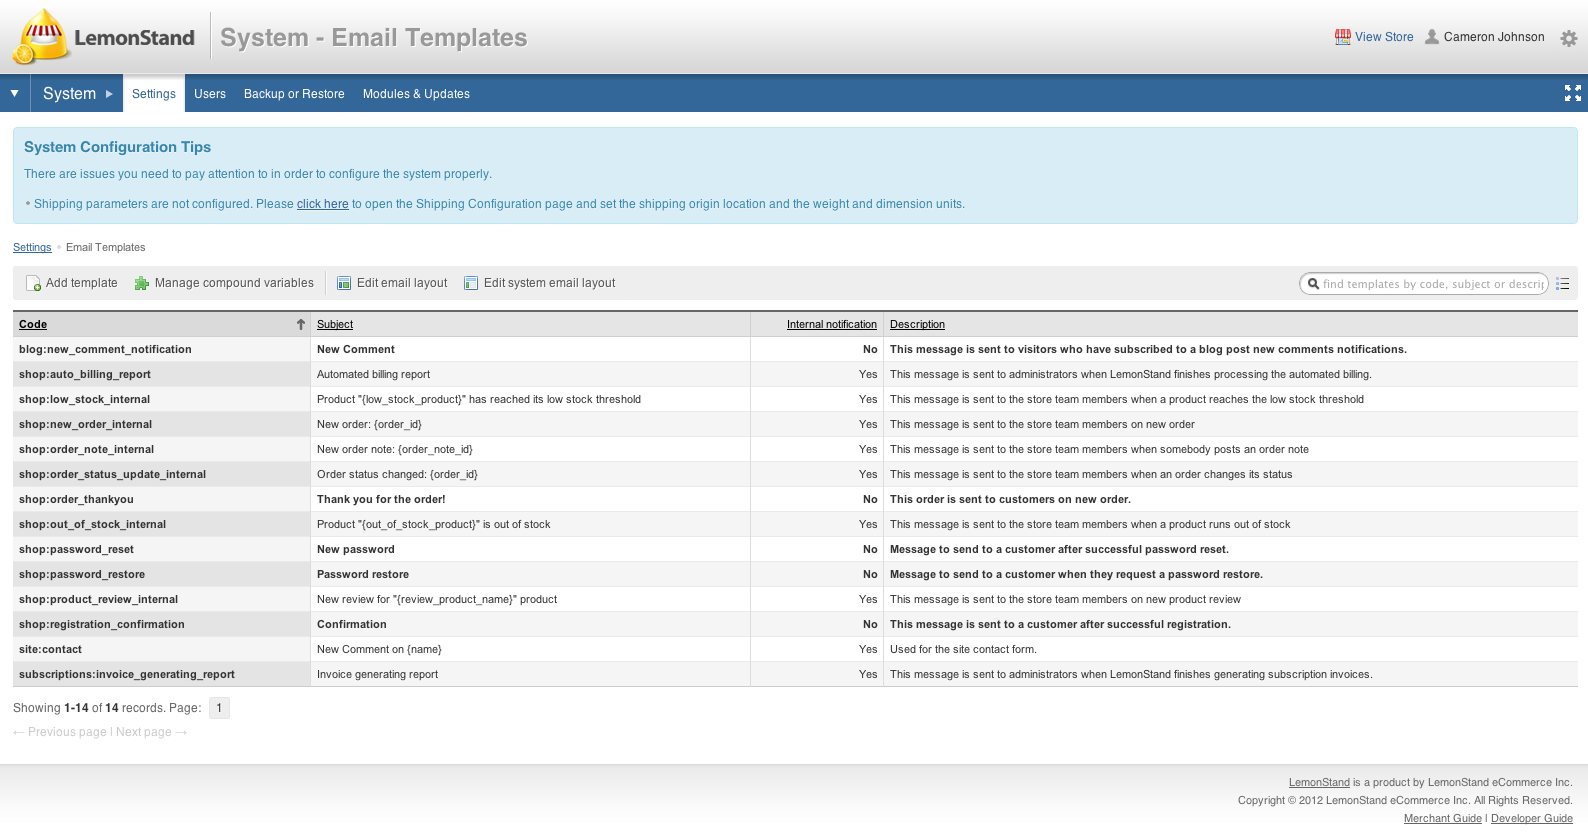
Here you can customize the email templates that get sent out with various functions such as new orders and low stock notifications. The layouts are customizable and you can add your own variables
using the Manage compound variables button. For more info check out Managing Email Templates
Customize
![]()
You can customize the backend portion of Lemonstand by uploading a logo image, and changing the header text. These will replace the LemonStand logo in the image above.

Under the Theme tab, you can choose different themes and colors to match your stores style.
You can create your own themes as well.
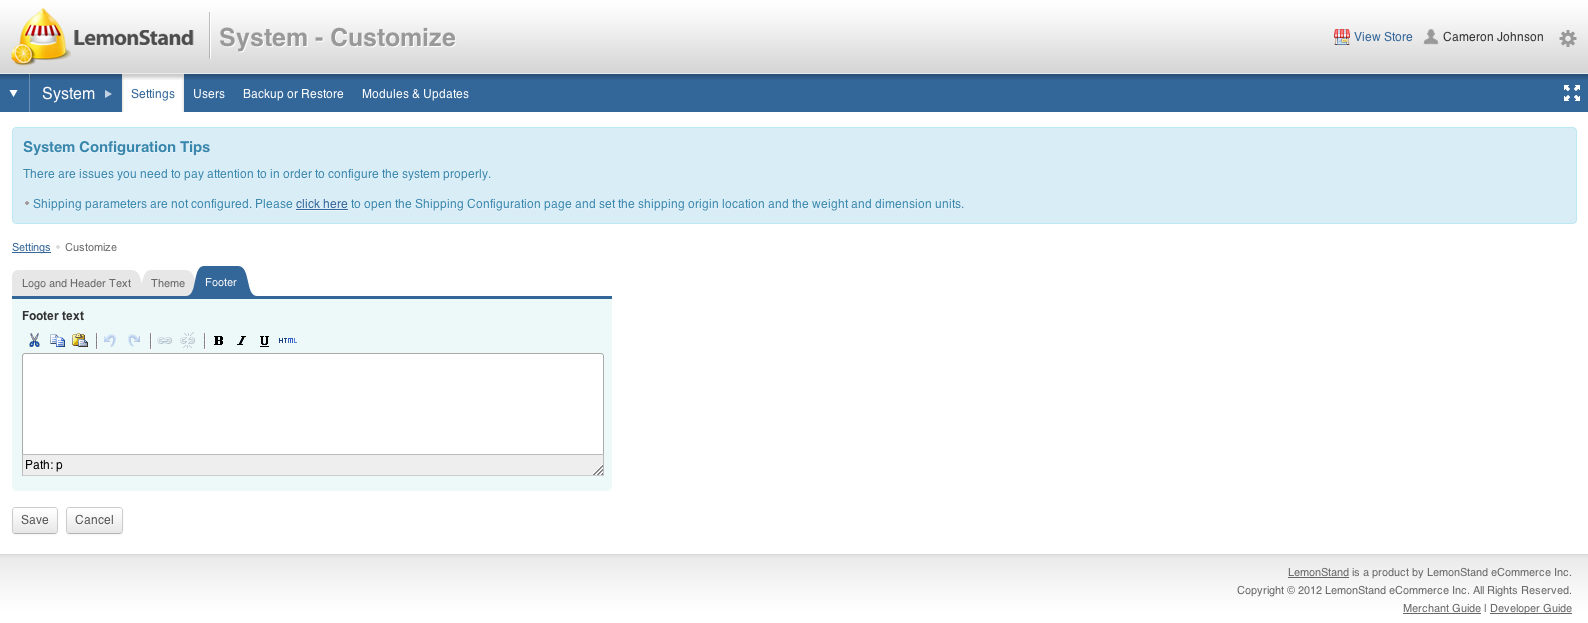
In the Footer tab, you can include text or HTML code that will appear on the bottom left of the backend pages of your LemonStand store.
eCommerce
Currency
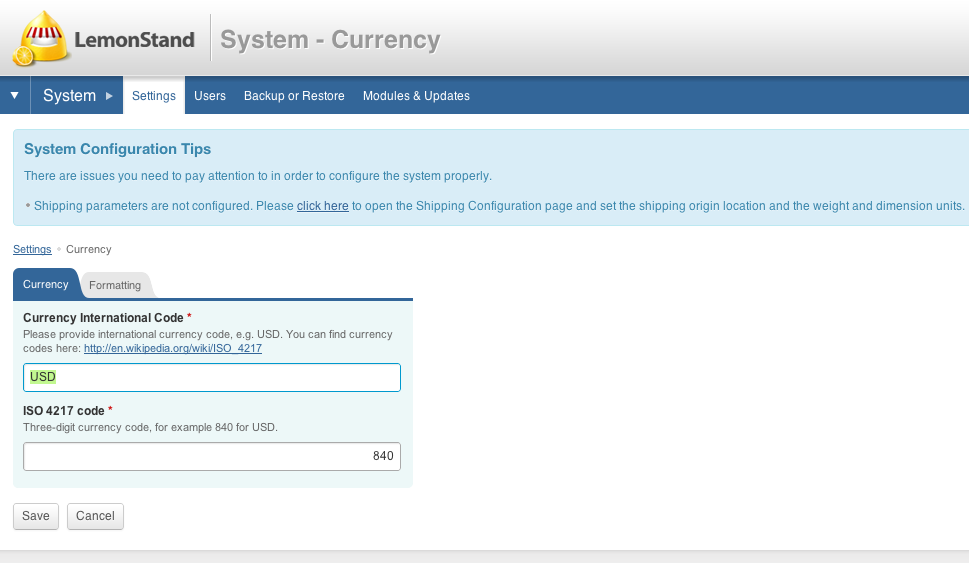
Here you can set the currency of your store. These settings will be used by shipping and payment modules for currency conversion.
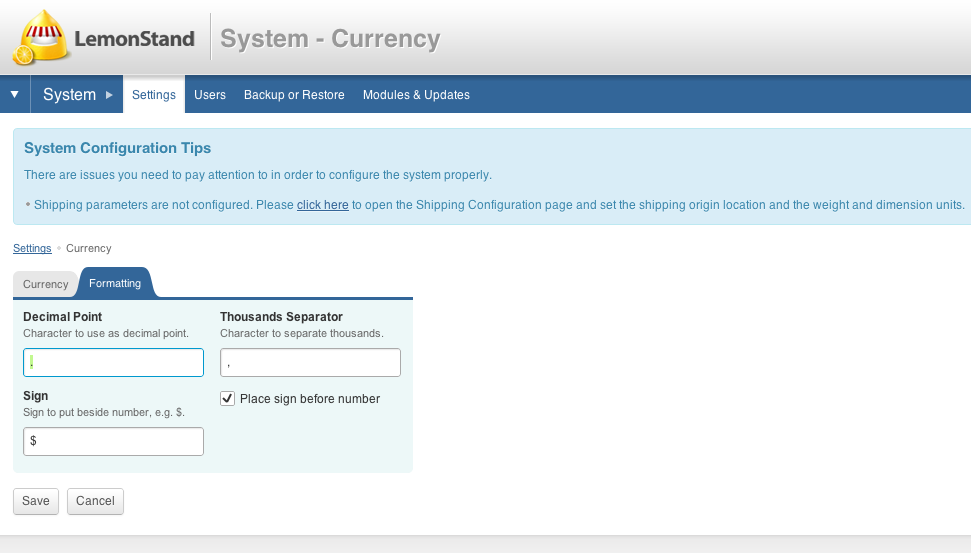
In the Formatting tab you can determine how you would like your currency to look. You can change the decimal point, thousands separator, and dollar sign.
This will affect the backend and frontend of your LemonStand store.
Currency Converter
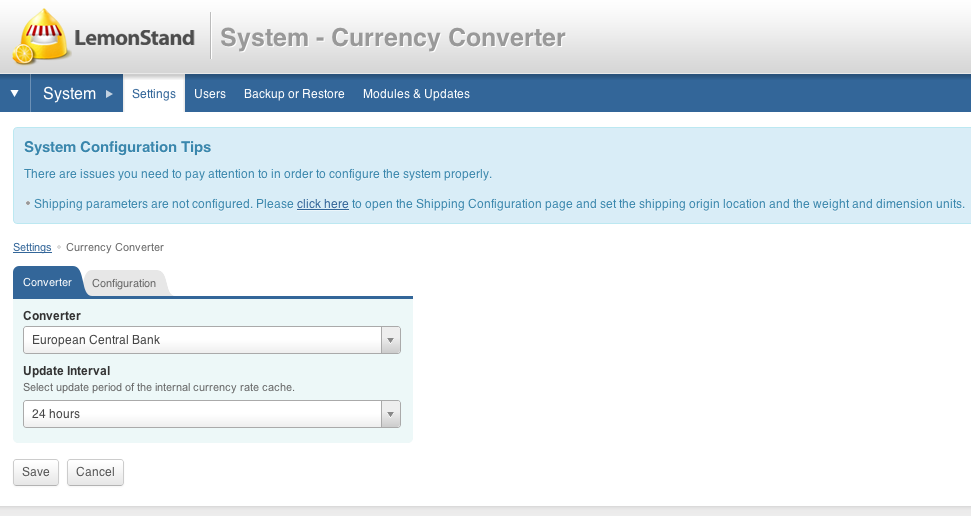
You can choose between the European Central Bank and Yahoo to handle the currency conversion when a customer purchases products from your store and are located in a different country that uses a different currency. You can also specify the update interval of how often your store grabs the most up to date currency rates.
Countries and States
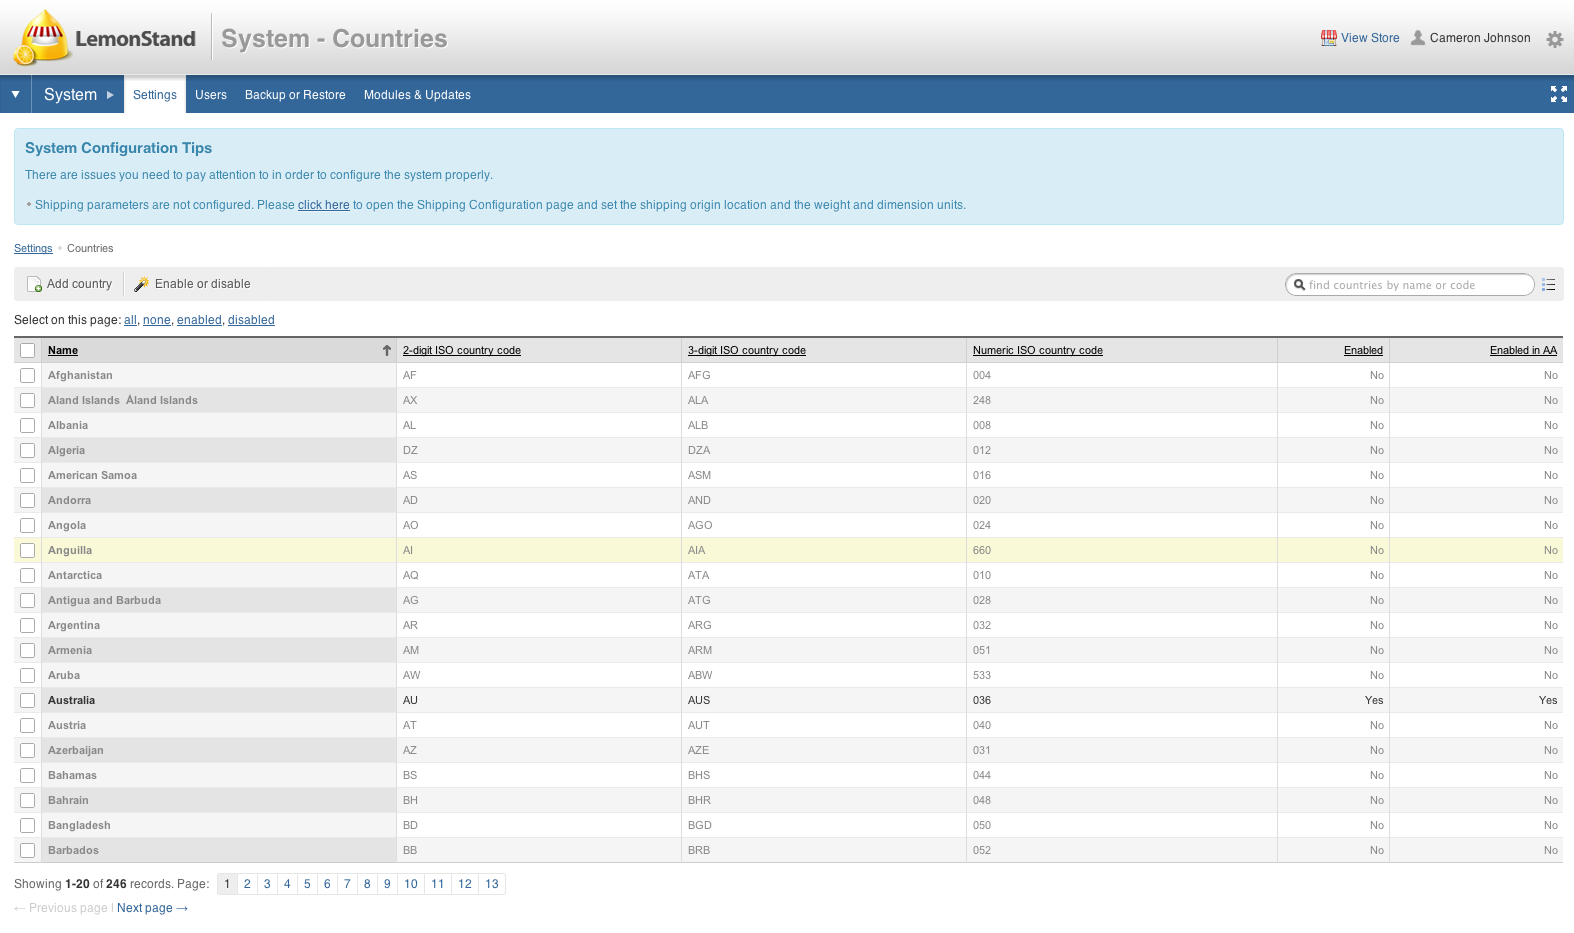
In the Countries and States option you can manage the list of countries that you cater to. Only the countries that are enabled will show up in your LemonStand store.
You can also add a country or state if it is missing from the list.
Shipping Configuration
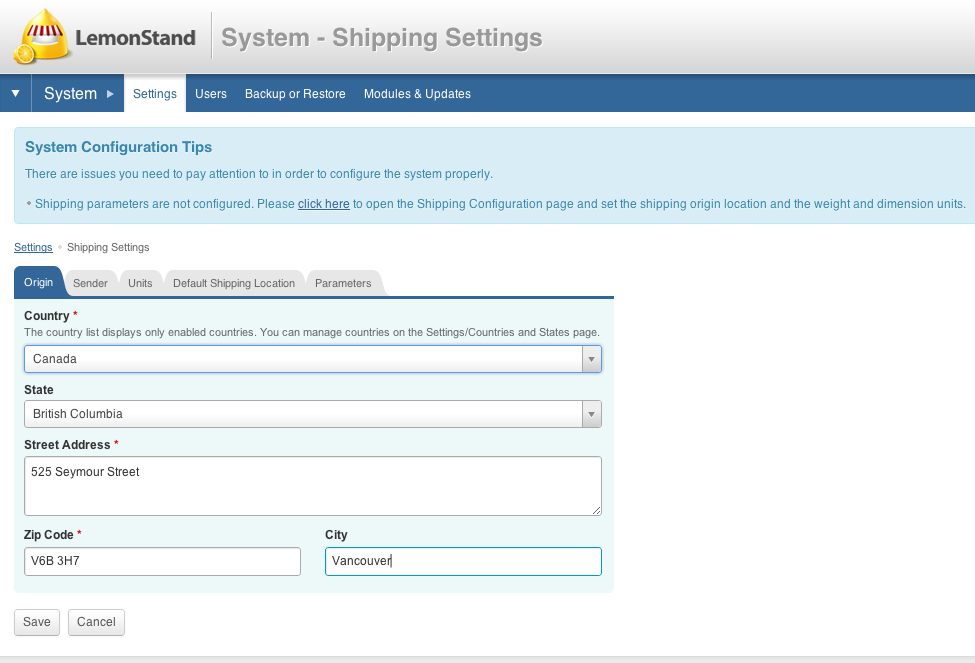
The origin tab is where you specify the location that your products are being shipped from. This will be used by shipping methods to determine the cost of shipping to the customer.
/docs/configuring_the_shipping_parameters/

The Sender tab information will be used when printing out shipping labels.
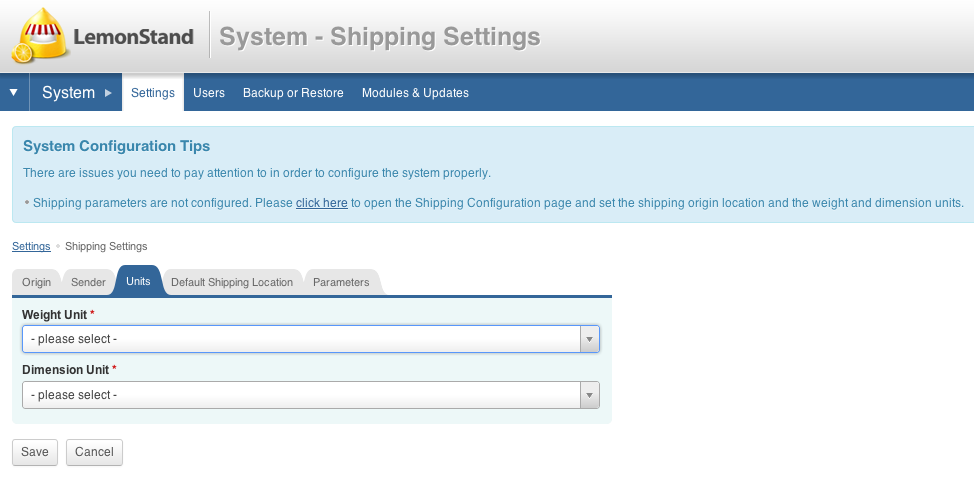
The Units tab is where you can select how you would like to specify weigth and dimensions that you will use for your products. For weight you can choose between Pounds or Kilograms, and for dimension you can choose between Inches and Centimeters.

The default shipping location can be used as a placeholder for when a guest goes through the checkout of your site for the first time. The shipping location will already be filled in with this information.
Also by setting the default shipping location Lemonstand will use your specified tax for that location to display tax inclusive pricing on the frontend of your store.
User Roles
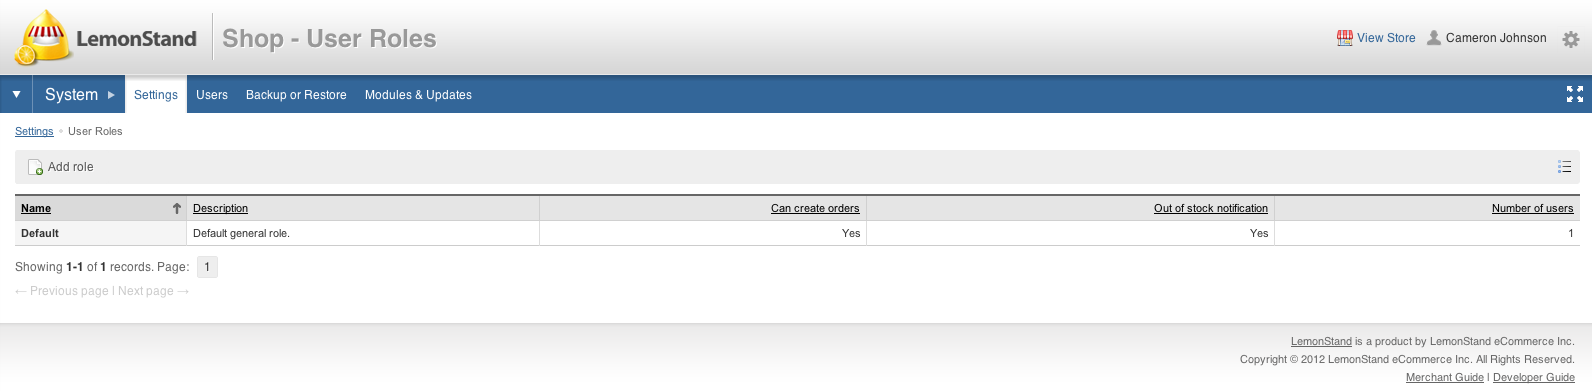
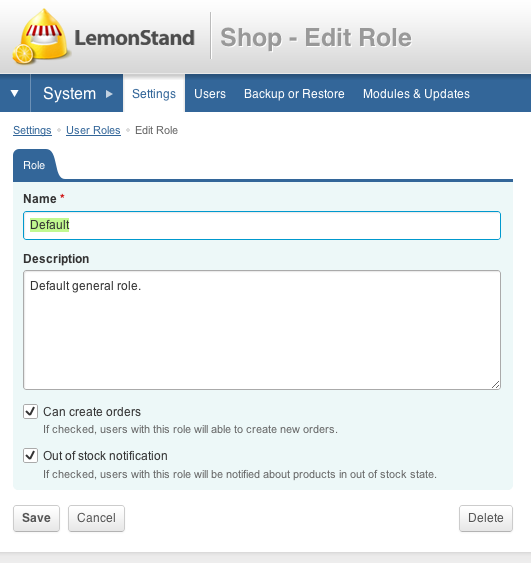
User roles are useful when you need to have different users responsible for specific order statuses. Such as having one user responsible for keeping track of orders being paid and one user responsible for getting paid orders shipped. An example is when an order has it's status changed to paid, you can set it up so that only the people responsible for shipping the product and changing the status from paid to shipped get notified.
/docs/configuring_the_order_route_and_user_roles/
Order Route
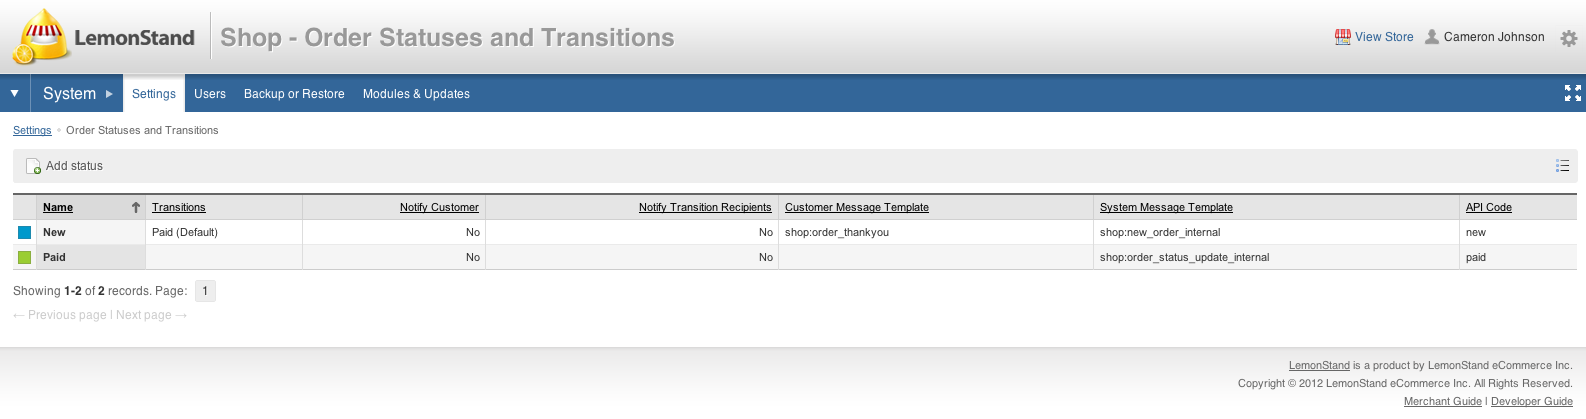
Order route helps you to distribute responsibilities between the store workers. The order route can be configured in a way that only users with specific roles can send an order from one status to another. LemonStand can send notifications to users who are responsible for sending an order to a next status in the order route. Also LemonStand can send notifications to a customer when an order gets to a specific status.
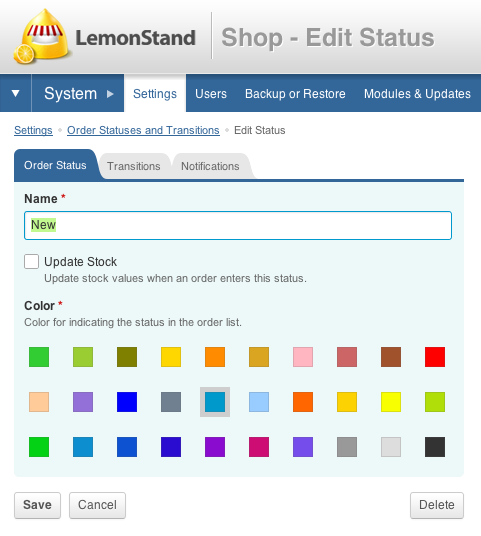
When adding or editing an order route you can define it's name and color under the Order Status tab.
![]()
In the Transitions tab you can define which user roles are responsible for handling the order when it becomes this particular status and to which status it can be changed to.
In this example the Order Status is New and can be set to Paid by the Default user roles.
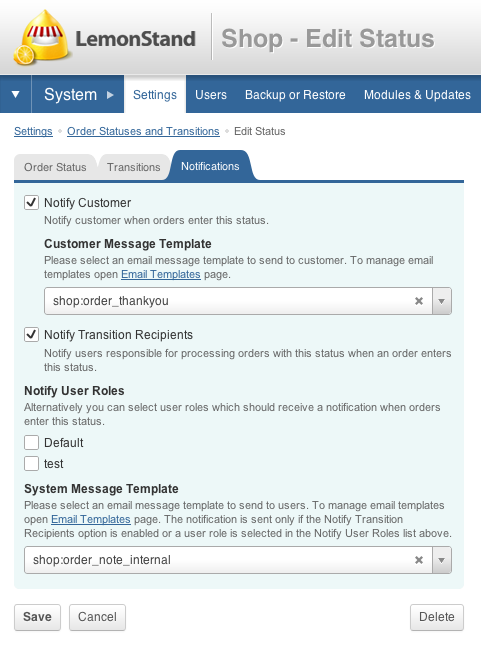
In the Notification tab you can choose whether to send an email to the customer and/or the transition recipients when an order becomes the status (in this case New).
You can also set which email templates you would like to use for the notification.
For the transition recipients you can alternatively specify which user role you would like to nofity. This is useful when you want multiple roles to be allowed to change the order status but only a select number of user roles to actually recieve an email notification.
Company Information
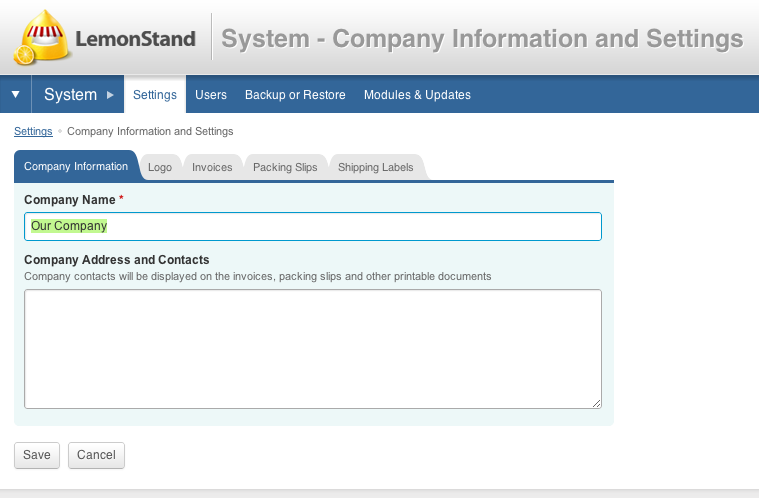
![]()
The company information and settings are used when generating out invoices, packing slips or shipping labels. You can set your Company Name and Company Address and Contact info, and a logo.
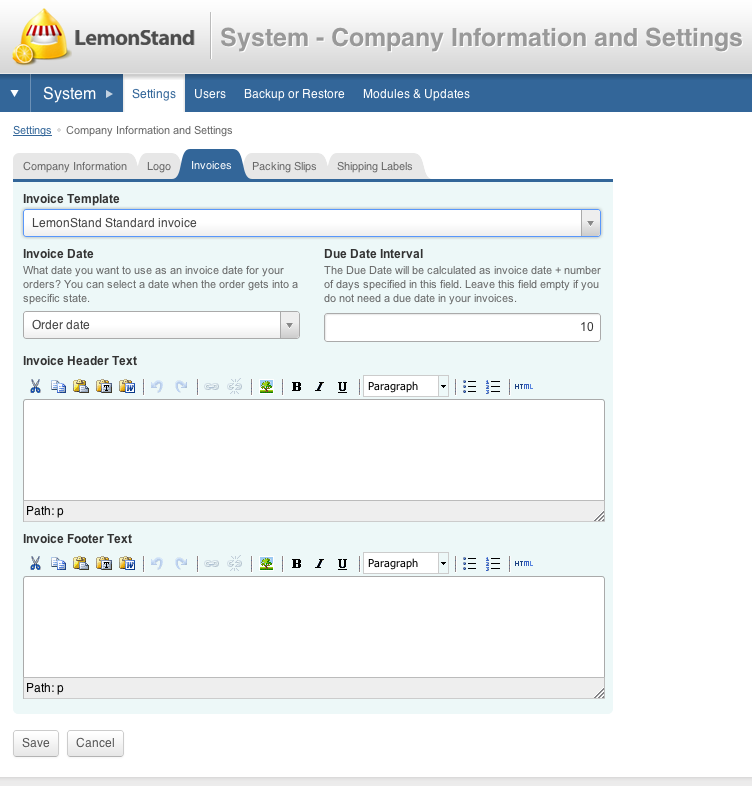

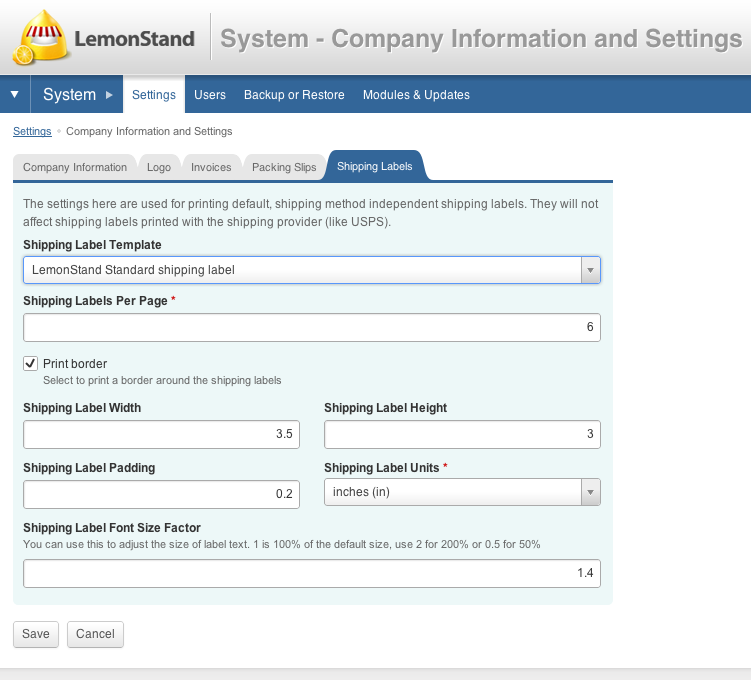
You can create your own custom invoices, packing slips or shipping labels by following this tutorial.
/docs/customizing_invoices_and_packing_slips/
eCommerce Settings
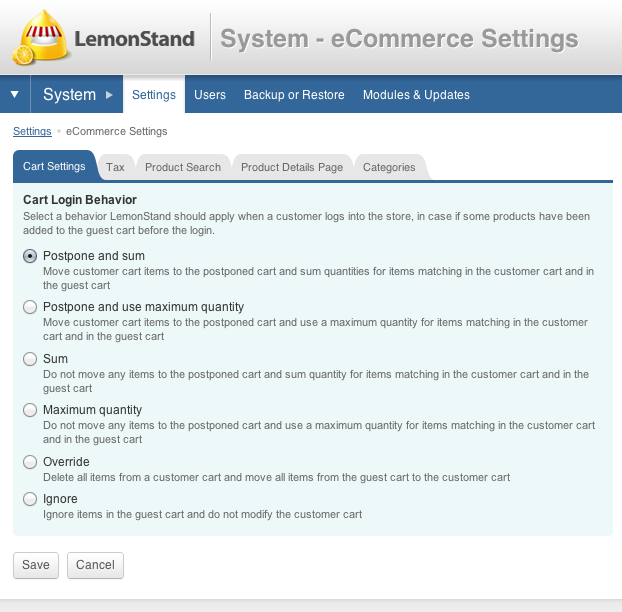
In the Cart Settings tab you can determine how you would like to handle the items already in a Guests cart if they decide to log in to their registered account.
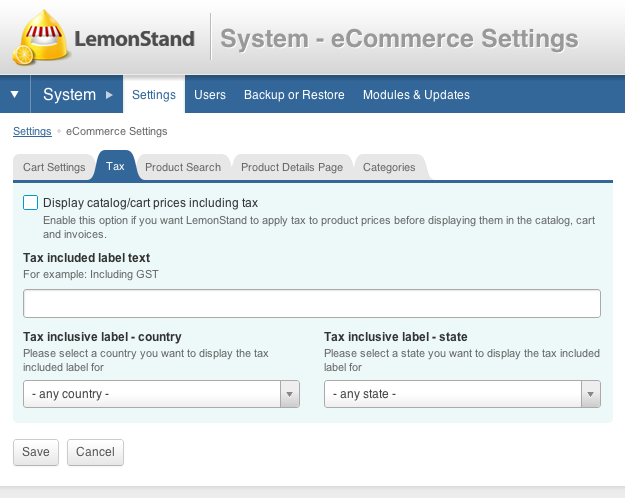
The Tax tab is used for setting tax inclusive pricing in your store. For more info please read
/docs/configuring_lemonstand_for_tax_inclusive_environments/
/docs/order_details_page_for_inclusive_tax_environments/
/docs/payment_receipt_for_inclusive_tax_environments/
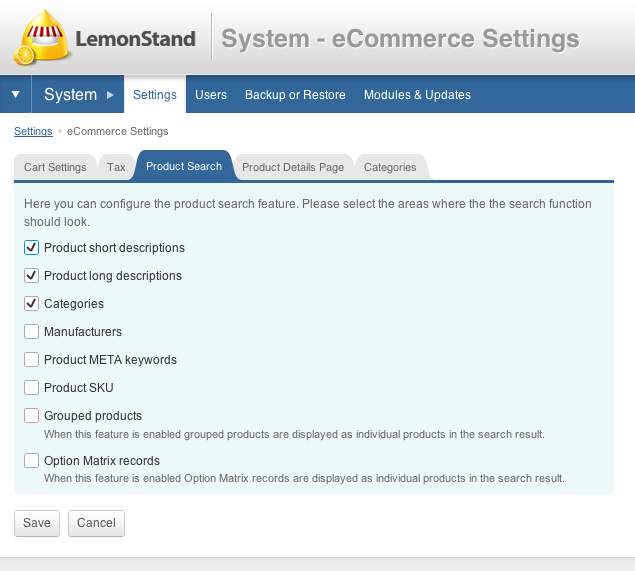
You can define where you would like the product search function to look for keywords.
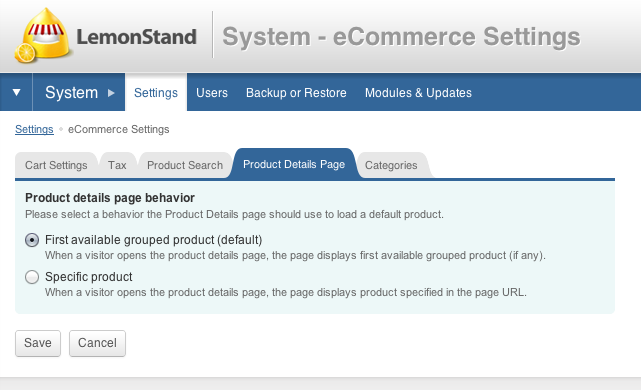
The product details page allows you to choose whether a specific product should be used when going to a product page, or just showthe first available grouped product.
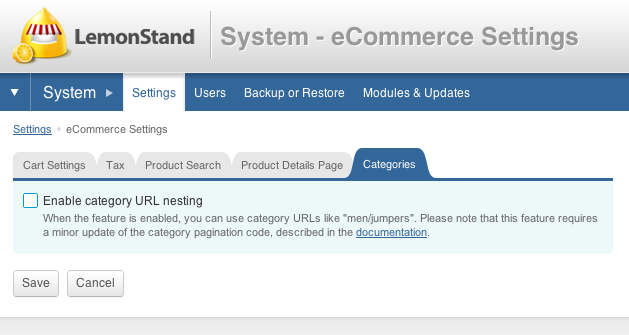
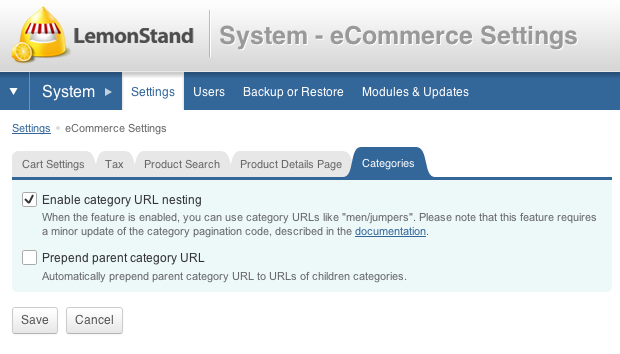
The Categories tab has the option to enable nested categories. How Lemonstand's default functionality works with categories is that the URL is composed of the word category and then the category name.
eg. /category/men
WIth nested categories you can add more parameters to the URL such as
eg. /category/men/jumpers
Now going to /category/men could be one page, and /category/men/jumpers would be another page, instead of just /category/jumpers.
The other option once you enable category nesting is to automatically prepend the parent category URL. When creating categories you can specify the parent category, which can be used to have seperate URLs for men and women clothing for example.
The next tutorial will teach you how to setup system user accounts
Next: System Users
Previous: Installation Steps
Return to Beginner's Guide